Button
Introduction
The following tutorial explains how to create and modify a button widget. Buttons can be used for a range of tasks: screenshotting, moving between pages, etc. Most commonly it is some form of mode switcher though.
Creating a button object
To create a button, you no longer use primitives but instead use a widget command (CTRL):
[gui.CTRL_BUTTON, x, y, width, height, font_size, text, cb_func]
Input Parameters:
x [int] = x coordinate of the top left of the button.
y [int] = y coordinate of the top left of the button.
width [int] = integer for the distance for x to draw to.
height [int] = integer for the distance for y to draw to.
font [int] = font of the text.
text [string] = string that will be displayed in the button widget. Can only use ASCII characters.
cb_func [func] = callback function to be triggered when a press has been released.
This small example program shows a displayed button:
import gui
def press_cb(button_info):
    pass

button = [gui.CTRL_BUTTON, 100, 100, 300, 150, 24, "PRESS ME", press_cb]
gui.show([
    button,
])
This button currently does nothing when pressed.

Using the button object with a callback function
The callback function is the most interesting part. It can be named anything however it is the convention to call it something relevant to what the button does followed by _cb for the callback. The callback is called when the button is released after being pressed. This can be shown more clearly when the function is used. You can make the button callback function do anything you can normally do in a function except for passing other parameters. We are now going to implement it as a counter function that displays on the button how many times it has been pressed. This is done by creating a global variable that can be incremented inside the function and concatenating the end into some text and adding this new text to the text element within the button.
import gui
counter = 0
def press_cb(button_info):
    global counter
    counter+=1
    # changes the text element inside the button with the counter
    # of the number of times pressed
    button[6] = "TIMES PRESSED: " + str(counter)
    gui.redraw()

button = [gui.CTRL_BUTTON, 100, 100, 300, 150, 24, "PRESS ME", press_cb]
gui.show([
    button,
])
The gui.redraw() is used to update the screen with the new text for the button. This can be done as the button is a list (which is mutable) and so you can change the data within it.
Callback data
The data passed to the callback function is the details of the button.
information_returned = [x, y, width, height, font, text, cb_func]
This can be useful for finding out which button just returned to a function if you have multiple.
You can also find the information abut the button press by returning another callback function from your original one:
import gui
counter = 0

def press_cb(button_info):
    global counter
    counter+=1
    # changes the text element inside the button with the counter
    # of the number of times pressed
    button[6] = "TIMES PRESSED: " + str(counter)
    gui.redraw()
    return press_info_cb

def press_info_cb(button_info, press_info):
    print(press_info)
    if press_info[0] == 2:
        print("LONG PRESS: {}".format(press_info[2]))
    elif press_info[0] == 0:
        print("NO PRESS")
    else:
        print("PRESS FROM: {}".format(button_info[6]))

button = [gui.CTRL_BUTTON, 100, 100, 300, 150, 24, "PRESS ME", press_cb]
gui.show([
    button,
])
press_info is a tuple of press information. You receive this same tuple in the event press callback and hence it can be processed in much the same way.
Adding colour to the button
Colour can be added to a button using:
gui_utils.FG_COLOUR(0x00FF00)
For the background and:
[gui.DL_COLOR_RGB(255,0,0)]
For the text.
Example code:
import gui
import gui_utils
counter = 0
def counter_cb(ctrl):
global counter
counter+=1
# changes the text element inside the button with the counter
# of the number of times pressed
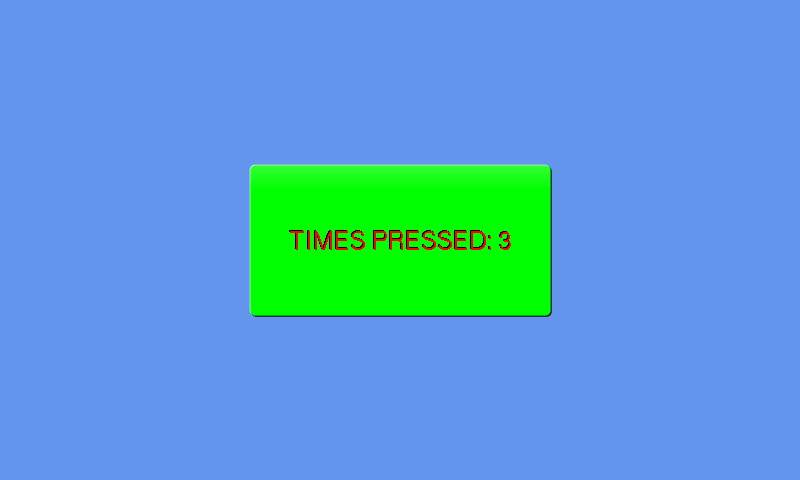
button[6] = "TIMES PRESSED: " + str(counter)
print(ctrl)
gui.redraw()
button = [gui.CTRL_BUTTON, 250, 165, 300, 150, 24, "PRESS ME", counter_cb]
gui.show([
gui_utils.FG_COLOUR(0x00FF00), # green background
[gui.DL_COLOR_RGB(255,0,0)], # red text
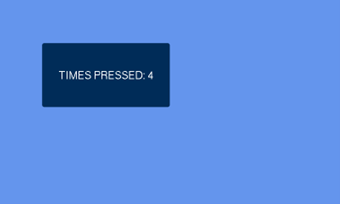
button, # when pressed the button will always be dark blue
])