Images
Applies to:
All variants
Introduction
Images on the VBOX are in the form of PNGs and need to be formatted further using software such as EVE Asset Builder because the microcontroller only accepts specific bitmap formats.
Installing and Formatting using Eve Asset Builder
Start by going to the following website: Toolchains - IC & Module and then click on the “Download the installation package from here” link of the EAB section

After doing so double-click the .exe file and install it to any folder, we tend to go with the one it suggests. Then open the EVE Asset Builder if it doesn’t automatically open. Your screen should look like this:
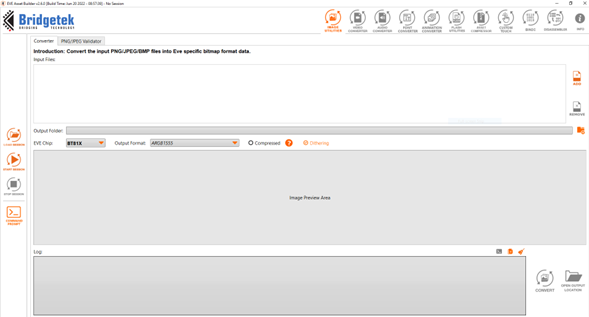
Along the top bar, you will see that there are many things that the Eve Asset Builder can do. We want to stick with the default one of “IMAGE UTILITIES”. Now click on the right-hand side where it says add and select the image you wish to convert (or drag and drop the image into the box). We will be using the following image for this example, feel free to download and use this image to follow along with this example.

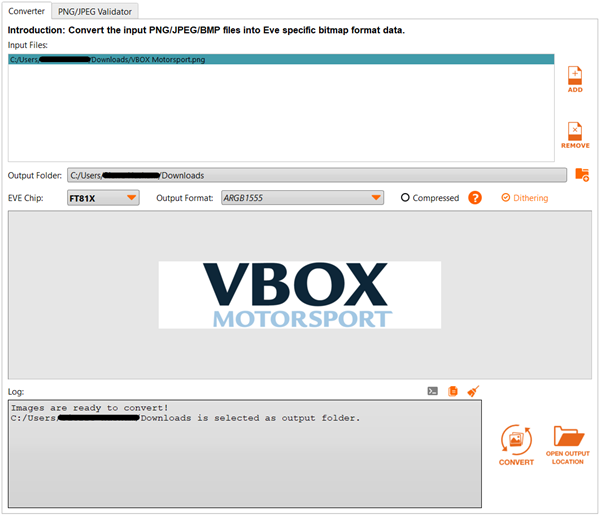
After doing this you need to select the output folder that you wish for this file to go to and then select the EVE Chip which for all the VBOX Touch products is the FT81X. It should now look like this.
Now click CONVERT in the bottom right. This will create 4 files in the folder that you chose. That should look like this:
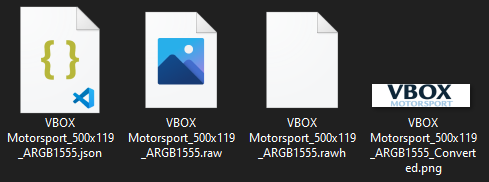
- You only need the .png file out of these. You probably want to rename it to something more relevant for example back to its original name so: “VBOX Motorsport.png”.
Now we recommend moving this into the folder that your workspace is going to be for this folder.
Creating an image on your VBOX Touch
There are many ways to create an image using VBOX Touch; in fact, you probably do it without knowing when you create a text widget.
Custom images, are harder to create than text as they aren’t built in like fonts/text. So to do this we recommend using our image.py framework which does the difficult bitmap conversion for you.
Warning:
There is only 1MB of space for loading in images and fonts. Because of this it is advised to compress your images wherever you can and try not to use anything with too high a resolution.
Remember that the VBOX Touch display is only 800 x 480 pixels so you will want to scale your image size to this, for example the icons we have on screen are usually about 50 x 50 pixels.
This framework is a new built-in library (as of 1.6) and hence can be used just by importing it:
import image
You will see that image has 2 classes Image and Image_Bank. You will only need an Image_Bank as this will create and manage the Image objects for you. So you can only import Image_Bank like this:
from image import Image_Bank
To load in an image and store it in the bank you need to provide it with its file path and file name. The easiest way to find the file path is by using the python os module:
import os
path = os.getcwd() + '/'
This will get the path of your current file (the main.py file). But as this is stored in the same place as your images (in Spifi) then there is no issue.
Then you need to instantiate the Image_Bank object. This should be treated as a Singleton.
When you instantiate you need to pass it a tuple of tuples. Each nested tuple contains the file path + name and then the name you wish to reference it by.
bank = Image_Bank((
    (path + 'icon-VBOX-Motorsport.png',          'VBOX_Motorsport'),
    (path + 'icon-moon.png',          'Moon'),
))
When you now wish to get an image you can use the name you assign along with the get function of Image_Bank.
bank.get('Moon')
This returns the object. With this object, you can use the various Image functions. To display the image using the Image functions you need to create a display list that you can put into gui.show()
generate_gui_l(self, tag=None, pos=None)
This will generate a display list command for the image. A full example of how you use this to display the image is below:
gui_l = [gui.DL_COLOR_RGB(255,255,255)]
gui_l.extend(bank.get('VBOX_Motorsport').generate_gui_l(255,(180,10)))
gui_l.extend(bank.get('Moon').generate_gui_l(255,(375,200)))
print(gui_l)
gui.show([
    [gui.DL_BEGIN(gui.PRIM_BITMAPS)],
    gui_l,
    [gui.DL_END()],
])

Picture buttons
If you want to make one of your images into a button there is also an inbuilt library for that (new as of 1.6). The library is called picture_button and it uses the Images/Image_Bank from the image library.
import picture_button
The picture button library contains the Picture_Button class that manages all the images. Hence the Picture_Button class is usually imported.
from picture_button import Picture_Button
This allows Picture_Button to be used without the need for picture_button.Picture_Button.
When you instantiate a Picture_Button object you need to pass it the following data: x coordinates, y coordinates, an image object, a name string, OPTIONAL: a callback function, an RGB colour.
Picture_Button(375, 10, bank.get('Moon'), 'Moon', default_cb, colour=(255,255,255))
This would create the Moon image in the centre top of the page in white.
Often you want more than 1 button though so it is easiest if you store all these picture buttons together in a list.
buttons = [
    Picture_Button(180, 10, bank.get('VBOX_Motorsport'), 'VBOX_Motorsport'),
    Picture_Button(570, 10, bank.get('Moon'), 'Moon', default_cb),
]
You will notice here that you do not need to give a callback or colour and the object will still be made. These parameters will be assigned with None and 255,255,255 (white) if not given any other data.
The default_cb function is a function that does nothing and is just there as a placeholder:
def default_cb(b):
    pass
When you need to create the picture buttons on your screen you need to use the create_picture_btns function. This will return 2 lists which both need to be put into the main display list to show the picture buttons.
This function needs to be passed a list of picture_btns.
def create_picture_btns(picture_btns):
    button_cbs_l = []
    button_icons_l = [gui.DL_BEGIN(gui.PRIM_BITMAPS)]
    for i, button in enumerate(picture_btns):
        if button.get_callback() != None:
            button_cb_l = [
                gui.PARAM_TAG_REGISTER,
                wrap_callback(button.get_callback()),
            ]
            button_cb_l.append(button.name)
            button_cbs_l.append(button_cb_l)
            button.set_gui_l_index(len(button_icons_l))
        button_icons_l.extend(button.generate_gui_l(i + 1))
    button_icons_l.append(gui.DL_TAG(0))
    return button_cbs_l, button_icons_l
This function needs this other function to operate:
def wrap_callback(callback):
    def cb(*args, **kwargs):
        callback(*args, **kwargs)
    return cb
An example of how you would call and then display the picture button display list can be seen below:
button_cbs_l, button_icons_l = create_picture_btns(buttons)
gui_l = []
gui_l.extend(button_cbs_l)
gui_l.append(button_icons_l)
gui.show(
    gui_l,
)
If you copy this through with the other code then this will display the 2 picture button objects that you created earlier.
To get a picture button you need to check you need to give the name attribute of your button to the get_picture_button function. This will then return the Picture_Button object.
def get_picture_button(name):
    for pb in buttons:
        if pb.name == name:
            return pb
    pb = None
    return pb
If you want to change the colour of your picture button then you can use the set_colour function along with gui.redraw() to update this change on the screen to do so.
get_picture_button('Moon').set_colour(gui.DL_COLOR(gui.RGB(255, 0, 255)))
gui.redraw()
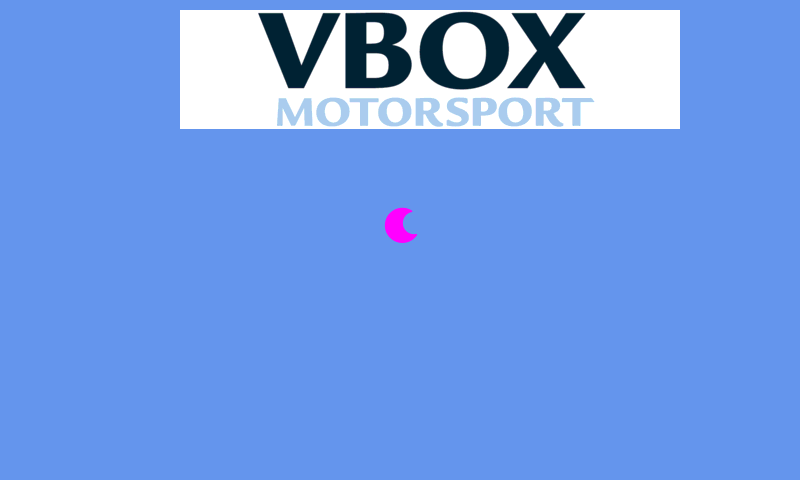
This will change the colour of the Moon picture buttons to purple.
Similarly to this, you can set a new callback using:
def new_cb():
    print("HI FROM THE NEW CALLBACK")
    import vts
    vts.leds(*([255,0,255]*4))
    vts.delay_ms(2000)
    vts.leds(*([0]*12))

get_picture_button('Moon').set_callback(new_cb)
This will set the new callback to new_cb. When you now press the Moon button it will output “HI FROM THE NEW CALLBACK” and change the LED colour to purple for 2s.
If you want to change the position of the button on the screen then you can use the set_pos function.
get_picture_button('Moon').set_pos((400, 240))
gui.redraw()
This needs to be redrawn for it to change. It takes an input of a tuple of an x and y coordinate (x, y).
This is most often used to move a button off the screen when it is not in use so it doesn’t have to be generated again.
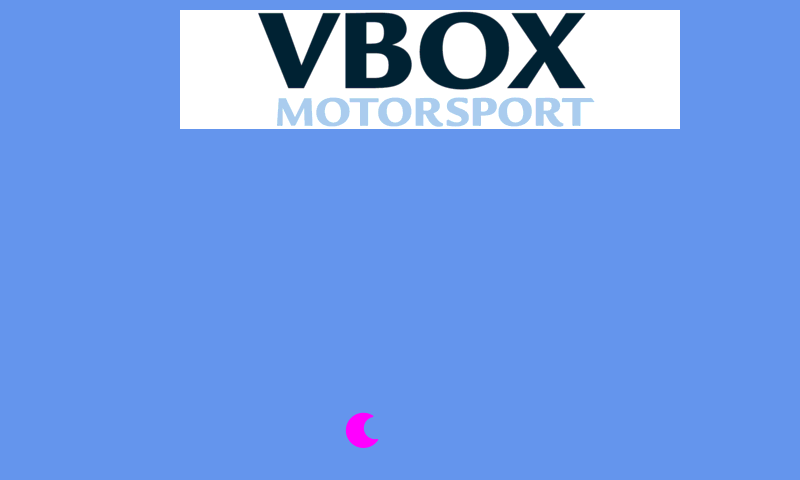
Full example
import gui
from os import getcwd
from picture_button import Picture_Button
from image import Image_Bank
import vts

def move_moon(b):
    get_picture_button('Moon').set_pos((vts.rand32()%800,100+vts.rand32()%330))

def wrap_callback(callback):
    def cb(*args, **kwargs):
        callback(*args, **kwargs)
    return cb

def default_cb(b):
    pass

def get_picture_button(name):
    global buttons
    for pb in buttons:
        if pb.name == name:
            return pb
    pb = None
    return pb

def create_picture_btns(picture_btns):
    button_cbs_l = []
    button_icons_l = [gui.DL_BEGIN(gui.PRIM_BITMAPS)]
    for i, button in enumerate(picture_btns):
        if button.get_callback() != None:
            button_cb_l = [
                gui.PARAM_TAG_REGISTER,
                wrap_callback(button.get_callback()),
            ]
            button_cb_l.append(button.name)
            button_cbs_l.append(button_cb_l)
            button.set_gui_l_index(len(button_icons_l))
        button_icons_l.extend(button.generate_gui_l(i + 1))
    button_icons_l.append(gui.DL_TAG(0))
    return button_cbs_l, button_icons_l

def main():
    path = getcwd() + '/'

    bank = Image_Bank((
        (path + 'icon-VBOX-Motorsport.png',          'VBOX_Motorsport'),
        (path + 'icon-moon.png',          'Moon'),
    ))

    global buttons
    buttons = [
        Picture_Button(180,  10, bank.get('VBOX_Motorsport'), 'VBOX_Motorsport', default_cb),
        Picture_Button(375,  200, bank.get('Moon'), 'Moon', move_moon),
    ]

    get_picture_button('Moon').set_colour(gui.DL_COLOR(gui.RGB(255, 0, 255)))

    button_cbs_l, button_icons_l = create_picture_btns(buttons)


    gui_l = []

    gui_l.extend(button_cbs_l)
    gui_l.append(button_icons_l)

    gui.show(
        gui_l,
    )

if __name__ == '__main__':
    main()